Thinking of entering the crypto market? Well, for that you need one essential tool, i.e. crypto wallet. From beginners to experienced professional traders, each one of them requires a secure wallet to operate and store their funds securely. However, most of the beginners are not quite aware of the wallet setup procedure.
The comprehensive guide here takes you through all the essentials that you need to know as a beginner stepping into the crypto industry. Read through the step-by-step procedures to protect your digital assets.
What is a crypto wallet?
Crypto wallets are the places where traders put their private keys that will later on assist them in interacting with blockchain networks. The name crypto ‘wallets’ does not automatically mean that they store the funds in the same way a traditional bank does.
To put it simply, a crypto wallet is a software/hardware tool assisting in storing the private keys and then used to prove your ownership and transaction signing on a blockchain.
Public Keys VS Private Keys
Moving further on, there are two types of keys:
- Public Key: It is an alphanumeric string generated automatically by the crypto wallet provider. Think of it more as an email address you share with individuals to receive crypto assets.
- Private Key: Another alphanumeric string, but the only difference is that the account owner should know this string. Kind of like an email password that you don’t share.
With the help of these two keys, an individual can operate on the crypto wallet without having to compromise on the currency integrity being traded.
Types of Crypto Wallets: Right Wallet for you
Before we dive into the setup procedure, you must understand the wallet categories and their usage:
Custodial Wallet:
When you purchase crypto assets using an application such as Coinbase, your assets automatically get stored in the hosted wallet/custodial wallet. Third-party stores your crypto for you, hence the name hosted. Very similar to how banks keep your money in a checking or savings account. Coinbase.com, Binance, Kraken, and Gemini are popular custodial wallets for you.
Advantages:
- Even after forgetting your password, you will not lose your crypto
- Beginner Friendly
- Integrated features of buying, selling, and trading
- Available Customer Support
- Includes insurance or fraud protection
Disadvantages:
- Company controls your private keys – not you
- Regulatory issues lead to frozen accounts
- Exchange hacks put funds at risk
- Limited accessibility to advanced DeFi features
Non-Custodial Wallets (Self-Custody Wallet)
Wallets like MetaMask, Trust Wallet, Phantom, Exodus gives you complete control of your crypto funds. These wallets do not rely on any third party or custodian to safeguard your assets. These software applications do keep your asset safe but the responsibility of remembering and protecting your account password is fully on you. Forgetting or loosing password means no other way to access your crypto ever again.
Advantages:
- No account freeze – full account control
- Access to the spectrum of DeFi applications
- Direct interaction with blockchain network
- No KYC for wallet account creation
Disadvantages:
- Full responsibility over security and backup
- Losing seed phrase = No password recovery
- Complex for beginners
- No built-in customer support
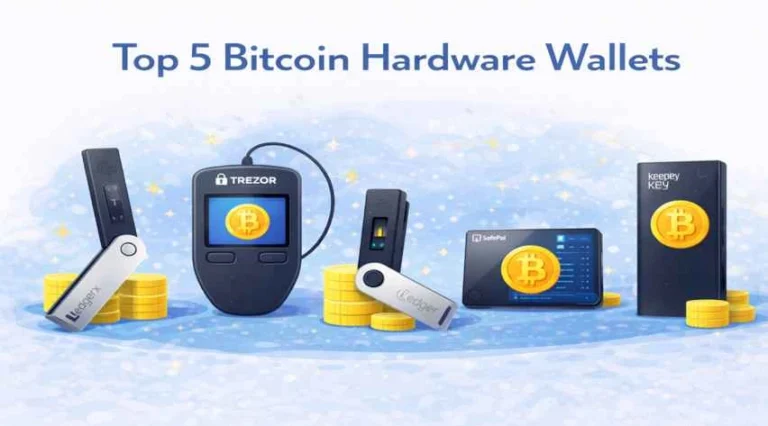
Hardware Wallet (Cold Wallets):
Physical devices that keep your private keys in offline mode. Its popular options, such as Ledger and Trezor gives strong protection against malware attacks and hackers. Cold wallets keep assets offline to enhance security level, making them immune to online hacking attempts.
Advantages:
- Unbeatable security level, private keys never surface to the internet
- Security against malware and phishing attacks
- Best for long-term storage of assets
- Can be use with software wallets simultaneously for extra security measure
Disadvantages
- These wallets are expensive and not very beginner friendly
- Not convenient for regular transactions
- Risk of device being stolen, damaged, or losing
- Secure backup of recovery seed phrase is required
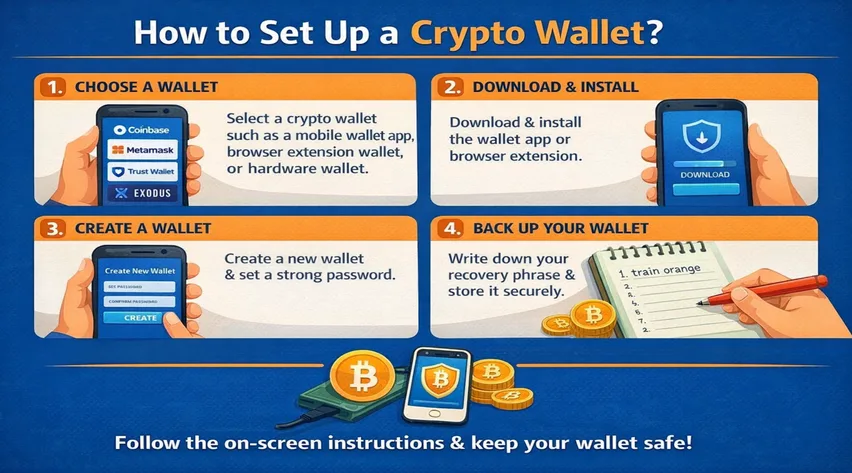
How to Set Up a Crypto Wallet (Step-by-Step)
In general, there are four basic steps. Choose the type of wallet that works best for you. Sign up for an account, buy the device or download the software needed. Set up your security features, including a recovery phrase. Purchase cryptocurrency or transfer coins from another wallet or exchange.
Setting Up on Coinbase (Example)
- Choose a Trusted Platform
Your main considerations should be security, ease of use, and compliance with government and financial regulations. Select a reputable exchange like Coinbase, Binance, or Kraken.
- Create Your Account
Enter your personal info and choose a secure password. It’s also recommended to use 2-step verification (also called 2FA) for an extra layer of security.
- Verify Your Identity
Most platforms require ID verification (KYC) to comply with regulations. Upload a government-issued ID and complete the verification process (usually takes minutes).
- Add Funds
Most crypto platforms and exchanges allow you to buy crypto using a bank account or credit card. Link your payment method and make your first purchase.
- Enable Security Features
- Activate two-factor authentication (2FA) using Google Authenticator or similar apps
- Set up biometric login (fingerprint/face ID) if available
- Review and adjust security settings and notification preferences
Time Required: 10-15 minutes total
How to Set Up a Hardware Wallet (Step-by-Step)
Setting Up Ledger (Example)
- Purchase from Official Sources
Purchase a Ledger Nano or Trezor from the official site or a trusted retailer. Never buy from third-party marketplaces like eBay or Amazon due to tampering risks.
- Install Wallet Software
Download the accompanying wallet software (e.g., Ledger Live or Trezor Suite) on your computer or smartphone.
- Connect the Device
Plug in your hardware wallet to your computer using the USB cable.
- Set a PIN
Choose a secure PIN to protect your device. This prevents unauthorized access if the device is stolen.
- Backup Recovery Phrase
The device will generate a recovery seed phrase. Write this down and store it in a safe place. Use the recovery sheet provided by the manufacturer, and consider metal backup plates for fireproof storage.
- Verify and Add Accounts
Follow on-screen instructions to verify your device authenticity, then add cryptocurrency accounts (Bitcoin, Ethereum, etc.) through the wallet software.
Time Required: 30-45 minutes for initial setup
Summing it Up!
Creating an account on crypto wallet platform to step in into the world of digital world is arguably the most essential aspect right now. You can either chose the simple custodial wallet, or non-custodial wallet for control, or hardware wallet for security. But the main thing is how important it is to understand the working and proper security practices of the wallet.
So, are you ready to step into the digital world? Select the wallet type, follow the setup process and take all security practices for smooth trading experience.
Frequently Asked Questions (FAQs)
Do I need a crypto wallet to purchase crypto asset?
Not instantly. When you purchase crypto from any exchange such as Coinbase or Binance, the assets are automatically stored in their custodial wallet. You can transfer them later on for maximum security.
What happens if I accidentally break my hardware wallet?
If you have your recovery seed phrase backed up securely with you, asset recovery on after purchasing a new hardware wallet will be possible.
Can someone steal my crypto if they know my Public key?
No, public key is a wallet address, meaning that it is meant to be shared. This is how people send you crypto assets.
What is the most secure type of crypto wallet?
Hardware wallets offer the highest security by keeping private keys completely offline. However, security also depends on proper seed phrase backup and following best practices regardless of wallet type.